It’s March 2020 and It is now a very strange and worrying time. As I write this, The coronavirus is wreaking Havock across the planet. I hope you keep well. This post was written just a few weeks before the outbreak in Wuhan which has changed everything. I hope it offers some pleasant distraction in this worrying time.

Hey and welcome to part 4! I’m motoring along quite nicely with the model build, even though it’s January 2020 and iv’e only managed to get the basic parts (almost) done. For example the fuselage, wings and tail.
Fuselage: it is now completely planked and the two half shells have been glued together. it’s been sanded nicely and the rear fin tongue glued in, fairing added and front and rear bamboo rings glued to the intake and exhaust holes respectably. These have been filed and sanded nice into the body of the plane, and I will add, look great! Below are some of the progress pics.
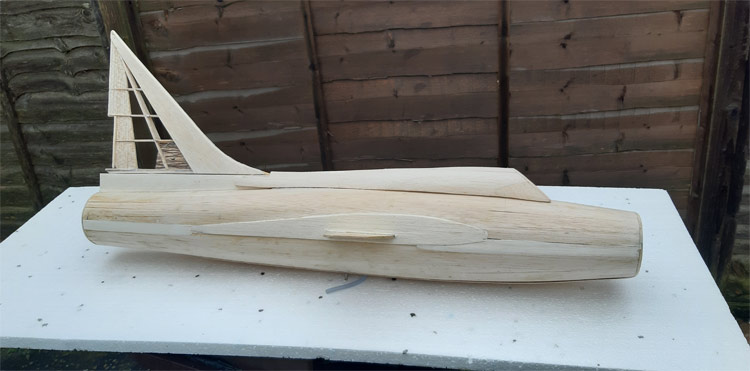


Latest pics. More overall sanding to the body, canopy spine and fin has been done since.

Pics from before… completed wing Boxes and fin tongue added.

Top pic shows lower fin section added to fin tongue and glued blocks of balsa ready for carving the canopy and spine. Lower pic- front end trimmed ready to glue on the 1/8″ diameter cane edging. Oh yeah, and the fathers day mug together with ubiquitous choccy biccies!
Wings: These were built on the dining table at home (lots of wintry rain outside) whilst listening to my Xmas present album, (Kendrick Lamar) which was really cool. The’re looking good, the wing retaining boxes having been built and glued into the wings with the spring clips also attached. Definitely took some work building these wings and there still a bit to go on these.


Wing boxes fitted with clock spring clips.

Wing basics. Still more work to do on these. Yes the wings look a bit lop-sided at the ends. I modified them to increase the wing area a little. They will be evened up later.
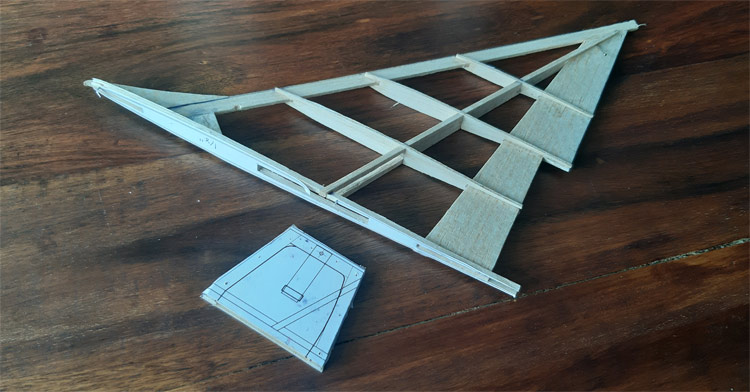
Tail: The fin was built over the CAD plan drawing as in the photo. Nice and simple, also with a sprung fin retainer box built and glued into the assembly. Now that the leading edge sheet is added, it’s looking hot!
I’m kinda mindful of the weight creeping up, so I’m only going to put light glass cloth over the front section of the fuselage and the hatch area, and maybe right at the tail as opposed to the whole plane. The rest will be covered in tissue and the wings and tail covered in silk.
Finishing up the wings and cutting the engine hatch are next! Thanks for reading:)