This one’s a killer! So in my on-going quest to build vintage models from this designer, I pulled out the plan for the free flight Hawker Typhoon which I purchased from Aeromodeller Plans Handbook ages ago. I studied the plan, made a note of all the materials and headed to by local friendly model shop.
The interesting thing about this model design is that there is very little build instructions on the plan. So it was with great surprise and interest that one day while cruising the Outerzone website I typed into the search bar for P.E. Norman Typhoon and right there was a download link for a PDF plan and written build instructions! There’s like four pages of very very detailed build instructions for this model that in no way would you be able to figure out just by looking at the plan.
I was going to share as many photos and videos of the build, but unfortunately, I seem to have lost all of the footage that was recorded on my phone on an SD card (big mistake). since I have several of these cards, I feel I’ve misplaced the correct one somewhere which I hope one day will turn up.
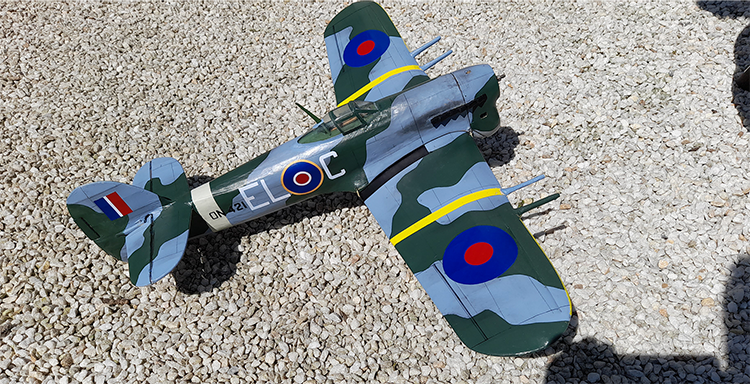
In the meantime here are some newer photos of the model in its finished state.
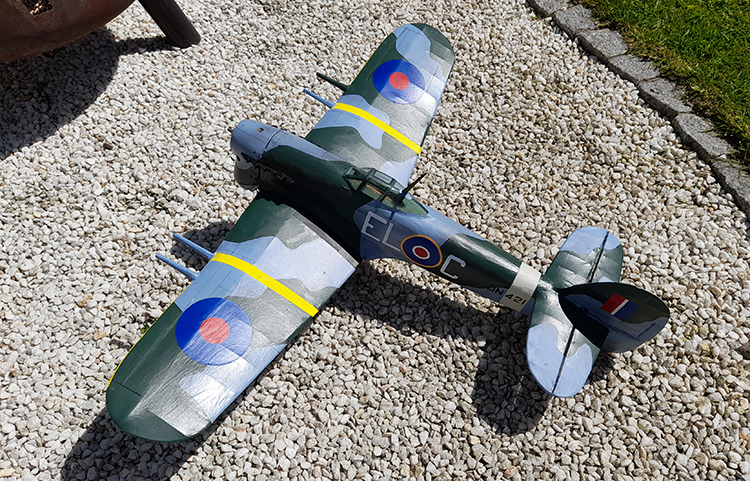
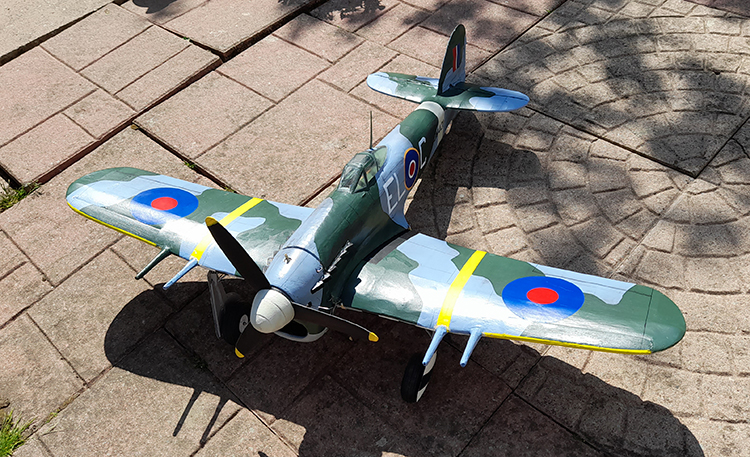

Money shot right here!
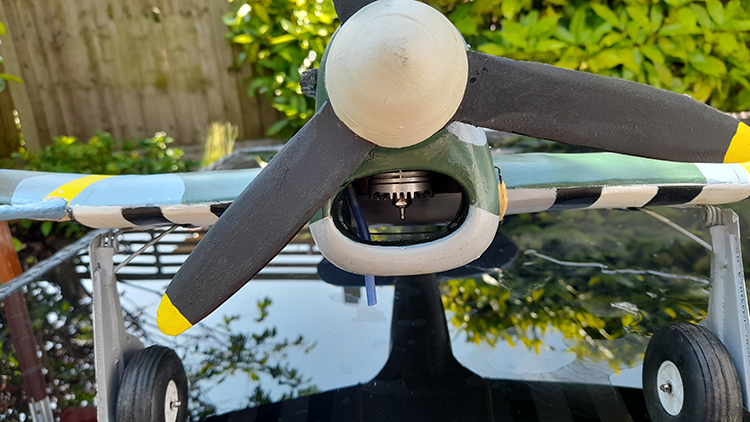
P.E. used a 1.8cc elfin diesel in his model and probably a few other types too. I’m using an Enya 09 cu in. in my model, which in hindsight is not ideal. The reason for this is that the motor is your standard front induction type, but it’s clear the model is designed to suit an Elfin which is rear induction.
I’ve found that because the engine is completely cowled (looks amazing) it is impossible to choke it for starting. The Elfin’s intake, being at the back, is reachable through a hole drilled thru the top of the cowl. It’s near impossible to get an Elfin engine, being vintage and no longer made, which is why I ended up using an Enya glow motor.
Build pics
Here’s a few pics that I found of the build..
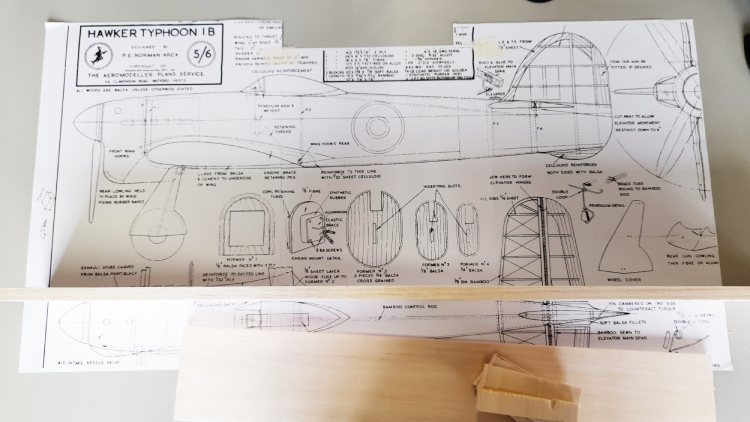
The plan!

1/2″ thick soft balsa glued together to make the buck
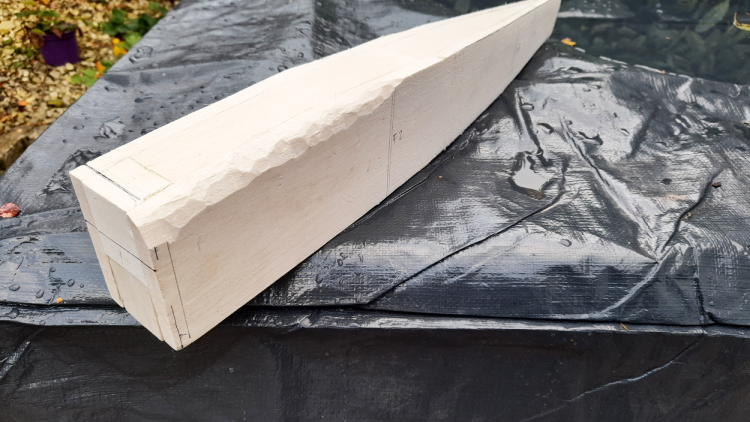
carving the buck. taking shape
fully carved buck complete and wetted brown sticky tape added for balsa sheeting. you can see the full written instructions, by ‘P.E.’ just behind which I downloaded from Outerzone.co.uk
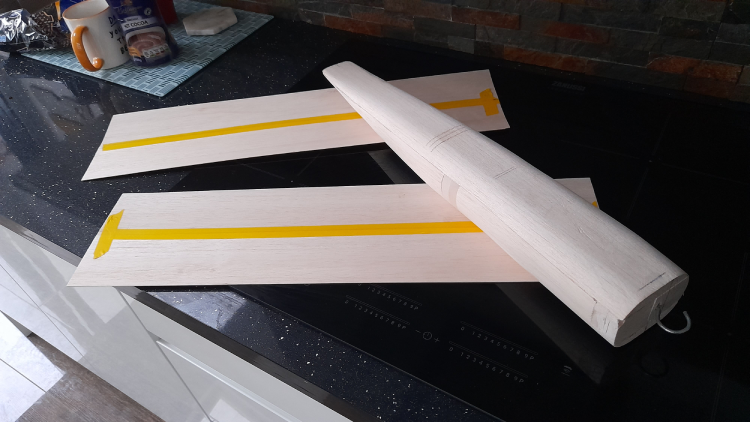
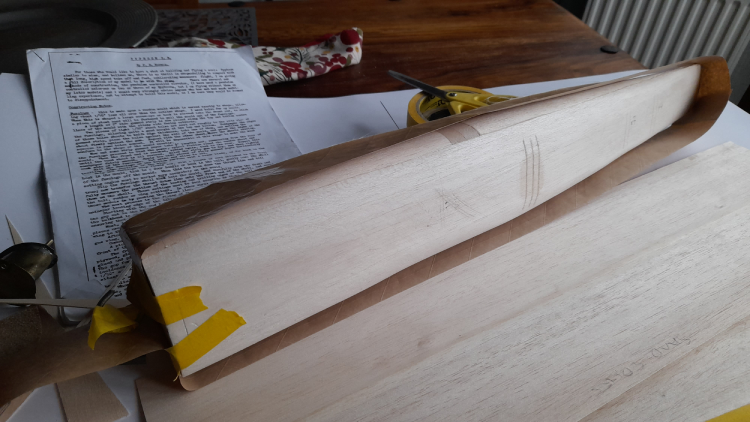
Two 1/32″ balsa sheet sides ready to wrap around the buck
Here’s how you make the fuselage. Carve, sand and shape a soft balsa block as per P.E. Normans’ instructions. To make the fuselage shell you glue together 4 sheets of light 1/32″ balsa sheet – 2 per side – edge on edge. Next you wrap one sheet, after soaking in hot water, to one side of the buck, then pin in place. Next, offer up the other side overlapping the first and run a glue joint between the two. Pin in place. Afterwards, long strips of 1″ wide brown paper tape with glue on one side is soaked in water, then wrapped tightly around the fuse, starting from the back to the front. This is repeated back and forth until a thickness of around 1/32″ is built up. Once dried, the finished result looks terrible! But it does need sanding after which improves it’s appearance.

buck fully sheeted and wrapped in brown paper tape – looks awful, but looks way better after sanding
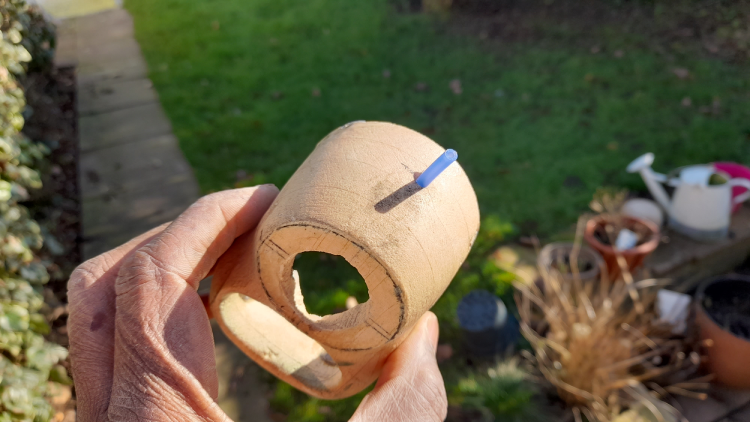
carved cowling – note fuel filler tubing
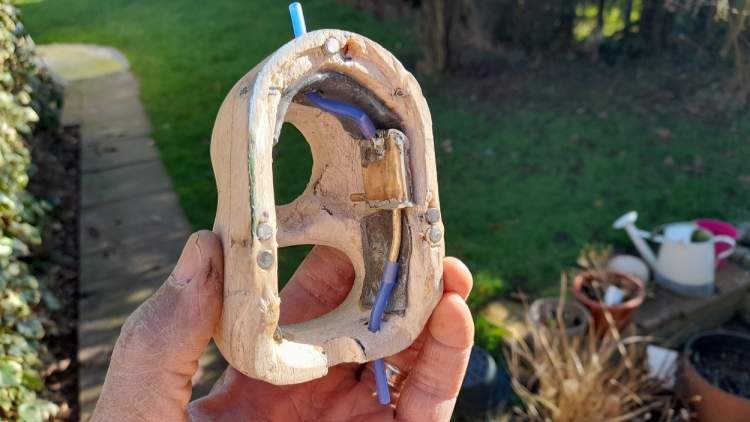
inside the cowl – note fuel tank, filler, feed and overflow tubes
Engine running
The very first attempts at starting the engine, once I’d finished the model, set the pattern for was to happen – shear frustration!! Turn the model upside down… fuel runs out the filler. Clamp the filler tube… can’t choke the engine. Squirt fuel through the exhaust port… flood the engine. Rinse and repeat!!
Eventually, when I did finally start the motor, it would run for a short while then just die down…
This went on for months. I tried everything. I won’t go into details here as it is just too boring!
PENDULUM
Yep, that’s right, this model has a pendulum. And it controls the elevator. It’s really simple in operation and very simple to make, though required a lot of patience in making, installing and setting it up. It’s very smooth in action and elevator movement is very small. Lets see how it works!!
Late 2025, December to be exact!
Its been quite some time since I wrote the start of this blog – around about a year (!) and I’ve only just decided to publish this first piece. So what’s the state of the state of the Typhoon? Well, apart from looking pretty beat up from my aggressive attempts to fly it, I tried various fuel tank arrangements, cowl mounting methods, propellers fuel & filler pipe routes etc, etc and I STILL couldn’t get the Enya engine to run inverted like it shows in the first photos. So I decided to try a new tack… change the motor.
In the end I tried using a Cox 049 Tee Dee engine. I completely changed the mounts etc etc and it kind of looks promising. Ive managed about a dozen very bad powered glides (underpowered) but I’m going to keep going, tweaking the set-up here and there. Eventually I hope to upload some pics and hopefully a few (proper) flight vids soon (if I can get it to fly)!! So watch this space 🙂